
构建自己的远程Jupyter Notebook服务器,添加system开机自启,让Jupyter Notebook支持跨网络访问的方法。
完全开放,不需密码
1. 登陆远程服务器
2.生成配置文件
$jupyter notebook --generate-config
3. 修改默认配置文件
$vim ~/.jupyter/jupyter_notebook_config.py
进行如下修改:
1 | c.NotebookApp.ip = '0.0.0.0' #支持其它IP访问,关键 |
4. 启动jupyter notebook:
jupyter notebook
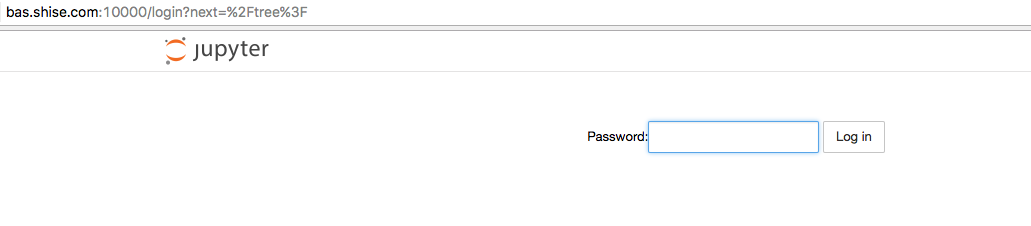
5. 远程访问
此时应该可以直接从本地浏览器直接访问http://address_of_remote:10000就可以看到jupyter的登陆界面,输入密码即可。
需要密码
1. 生成密码
打开ipython,创建一个密文的密码:
1 | In [1]: from notebook.auth import passwd |
2. 添加密码
$vim ~/.jupyter/jupyter_notebook_config.py
进行如下修改:
1 | c.NotebookApp.password = u'sha:ce...刚才复制的那个密文' |
3. 建立ssh通道
若还是无法登录,也可用
ssh username@address_of_remote -L 127.0.0.1:10000:127.0.0.1:10000
建立ssh通道,便可以在localhost:10000直接访问远程的jupyter了。
添加system开机自启
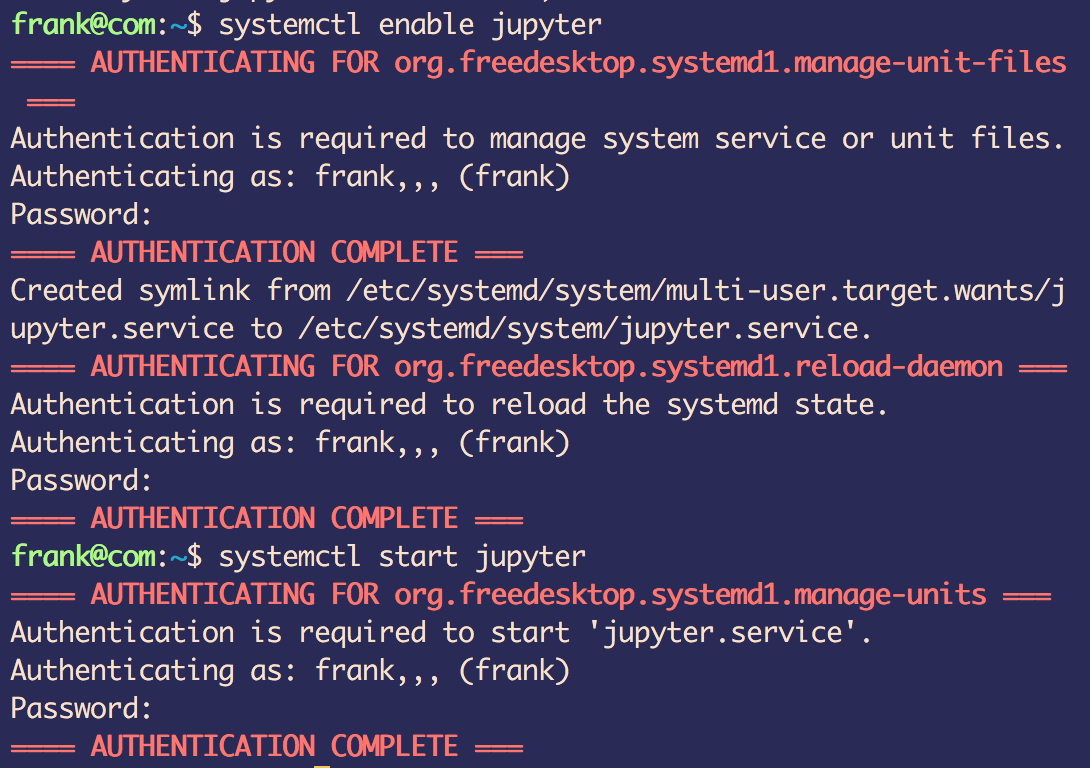
将 Jupyter Notebook 设定为系统服务并且开机自动启动,这里以 systemd 下的设定为例,创建文件 sudo vim /etc/systemd/system/jupyter.service 文件,内容是
1 | [Unit] |
上面你需要把我的用户名frank替换掉,保存文件之后执行systemctl enable jupyter
再执行systemctl start jupyter
即可,需要输入几次密码,之后重启Notebook会自启。
内网穿透
结合下文的方法,用ftp即可做到